
 Do you want to know how to turn an ordinary white t-shirt into something with pizazz? Well, today I'm going to show you how you can restyle any shirt within your reach, using an awesome technique using freezer paper, an exact-o knife and fabric paint (I get butterflies in my stomach every time I think about it!!). Here is what you need:
  Freezer paper,
  fabric paint,
  paint brushes,
  an iron and ironing board, and
  a cool design.
  Step #1: Trace your design onto the non-shiny side of your freezer paper. I added some embellishments of my own... make sure you get creative and add your own flair to it.
  Step #2: Cut your design out with an exact-o knife. While doing this, I found that it is easier to cut with a downward stroke.
  Make sure you save any bits of paper that you cut out your design because they will be used later.
  Step #3: Make sure you iron is on a 'no steam' setting and heat it up to the 'linen/cotton' temperature.
 Step#4: Slip a piece of regular paper into the shirt you will be working on... if you don't do this step you will end up with blotches of paint where you don't want it.
Step #5: Lay your design, shiny side down, on your shirt. Make good and sure that every thing is straight and that the shiny side is laying directly on the shirt fabric!! If the shiny side is not facing down, then you will end up with a design stuck on you iron... not cool :D.
 Step #6: Lay the heated iron directly on top of your design. Iron away and make sure that all the sides are sealed.
 Step #7: Remember the cut out pieces of your design I told you to save? Now they come in handy! Arrange the cut out pieces where you want them and iron them on.
 Step #8: PAINT TIME!! What type of paint do you use? Well, I used Tulip fabric paint. However, I'm thinking that any machine washable, permanent, fabric paint will be fine. Anyhow, pick out you favorite,snazziest color and squirt them onto a paper plate. I had to mix my paint so if you are mixing make sure you do that now.
 Step #9: Now it's time to get happy! Paint away, girl. When painting, begin at the edges and pull the paint in toward the center... this will help the stencil stay down and make sure your paint doesn't go places you don't want it.
 Keep painting!
 And painting!
 Step #10: Now begin to peel you stencil away. This was the first time I ever attempted freezer paper stenciling... so, at this point in the process, me and my sisters were squealing with delight because it was turning out so well. I was soooo delighted!
 Step #11: Now that the outer stencil is off it's time to pull the inner stencils away. Get some tweezers out and begin to pick them things away!

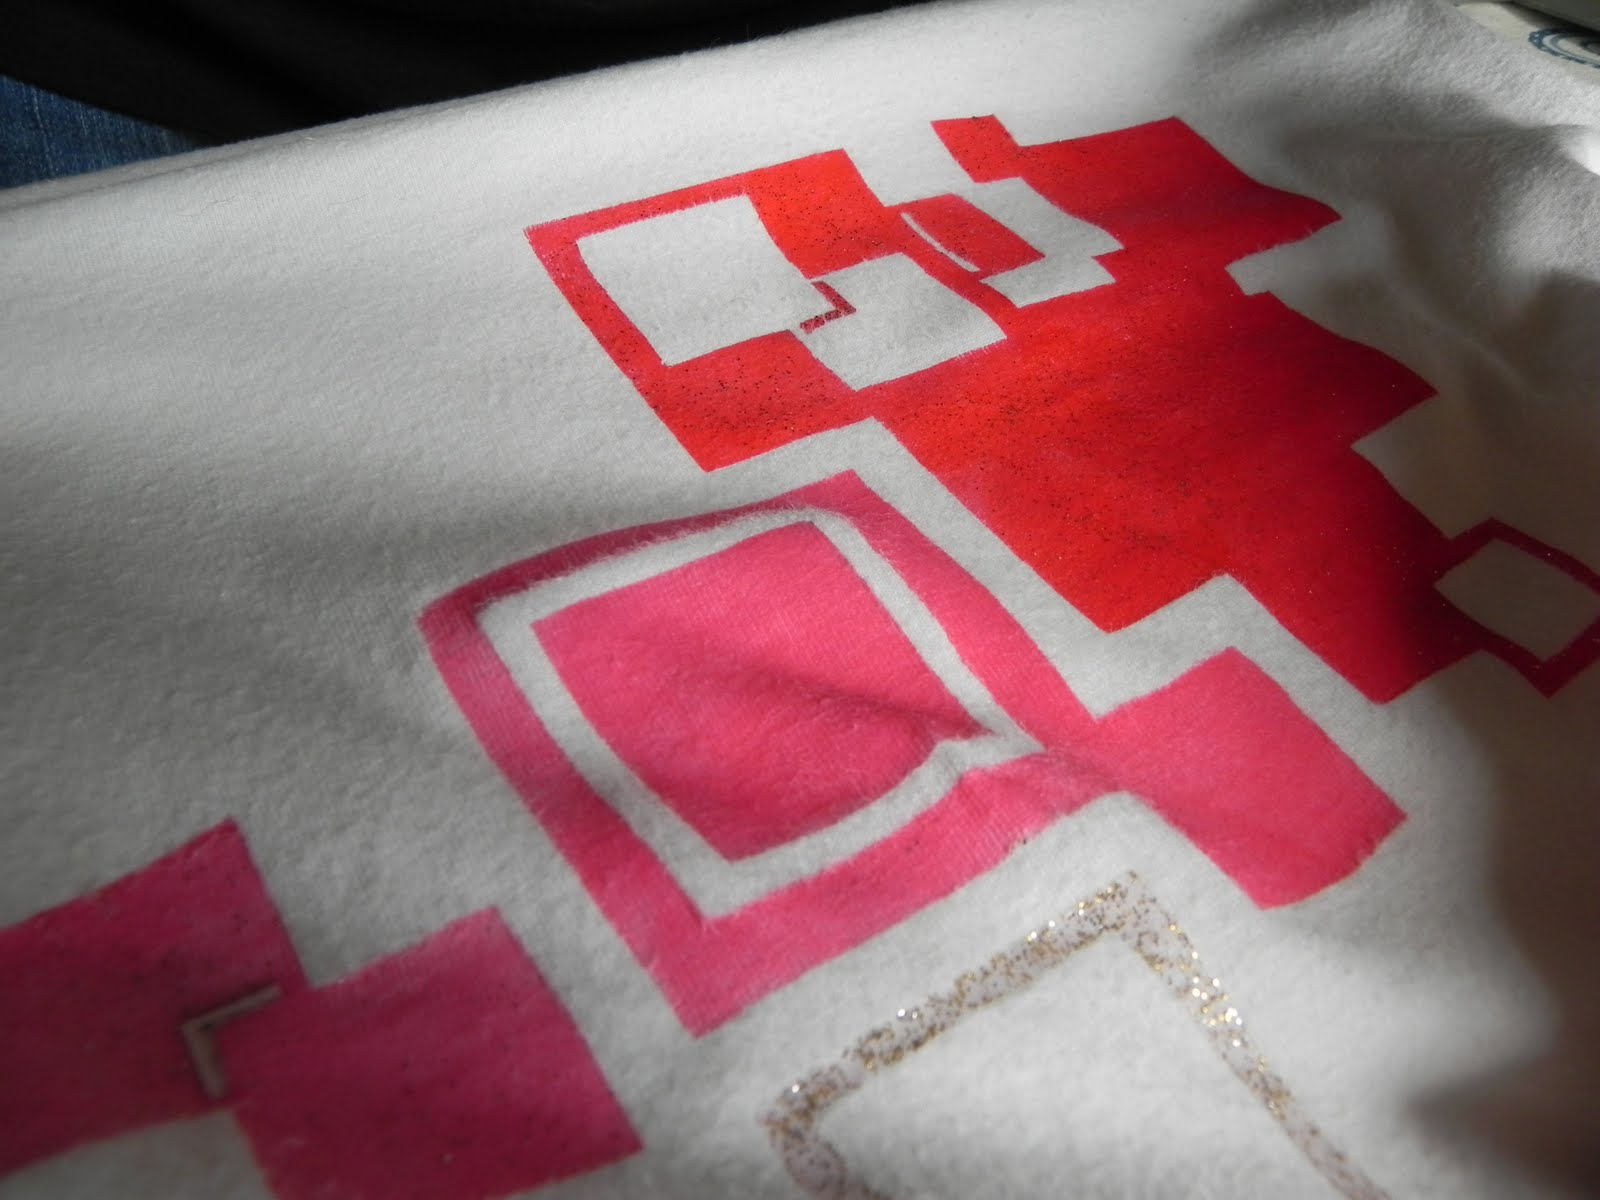
 This project turned out soooo well! I was extremely happy with myself and my sister Ann (stylish squares is her shirt) is crazy over it. I now have three more requests: Patrick wants me to make him an American themed shirt, Alva (10 yo) wants a soccer themed shirt, and Grace (4yo) discreetly made me bend down so she could whisper into my ear, "I would really like it if you made me one for my birthday." Gotta love the honesty of kids, right? Haha! Much love to my followers...
3 comments:
Yeah! That shirt turned out totally awesome!! I love it and it is now one of my top shirts :) :) Thank you so much moe!! And Grace was soooo cute when she whispered that in your ear.
Much Love!!
Ann
That is a really cute shirt. Good job.
This is really cute!! How cute is Grace.. Thank you so much Moe for visiting my blog and leaving such a sweet comment. I hope you have a wonderful night. Hugs, Anne
Post a Comment